

Optimize your manufacturing process with cutting tool metrology
> Monitoring the status of Cutting tool regurally
> Cutting tool expiration date
> Cutting tool wear
> Unstable manufacturing accuracy
> Full 3D profile of cutting tools
> Insert positioning and deviation
> Dimensional inspection
> 3D microdefects
> 1 micrometer resolution
> Fast & automated scanning
> User-friendly measurement and analysis
> Automated inspection report generation
> Export your data and inspection reports
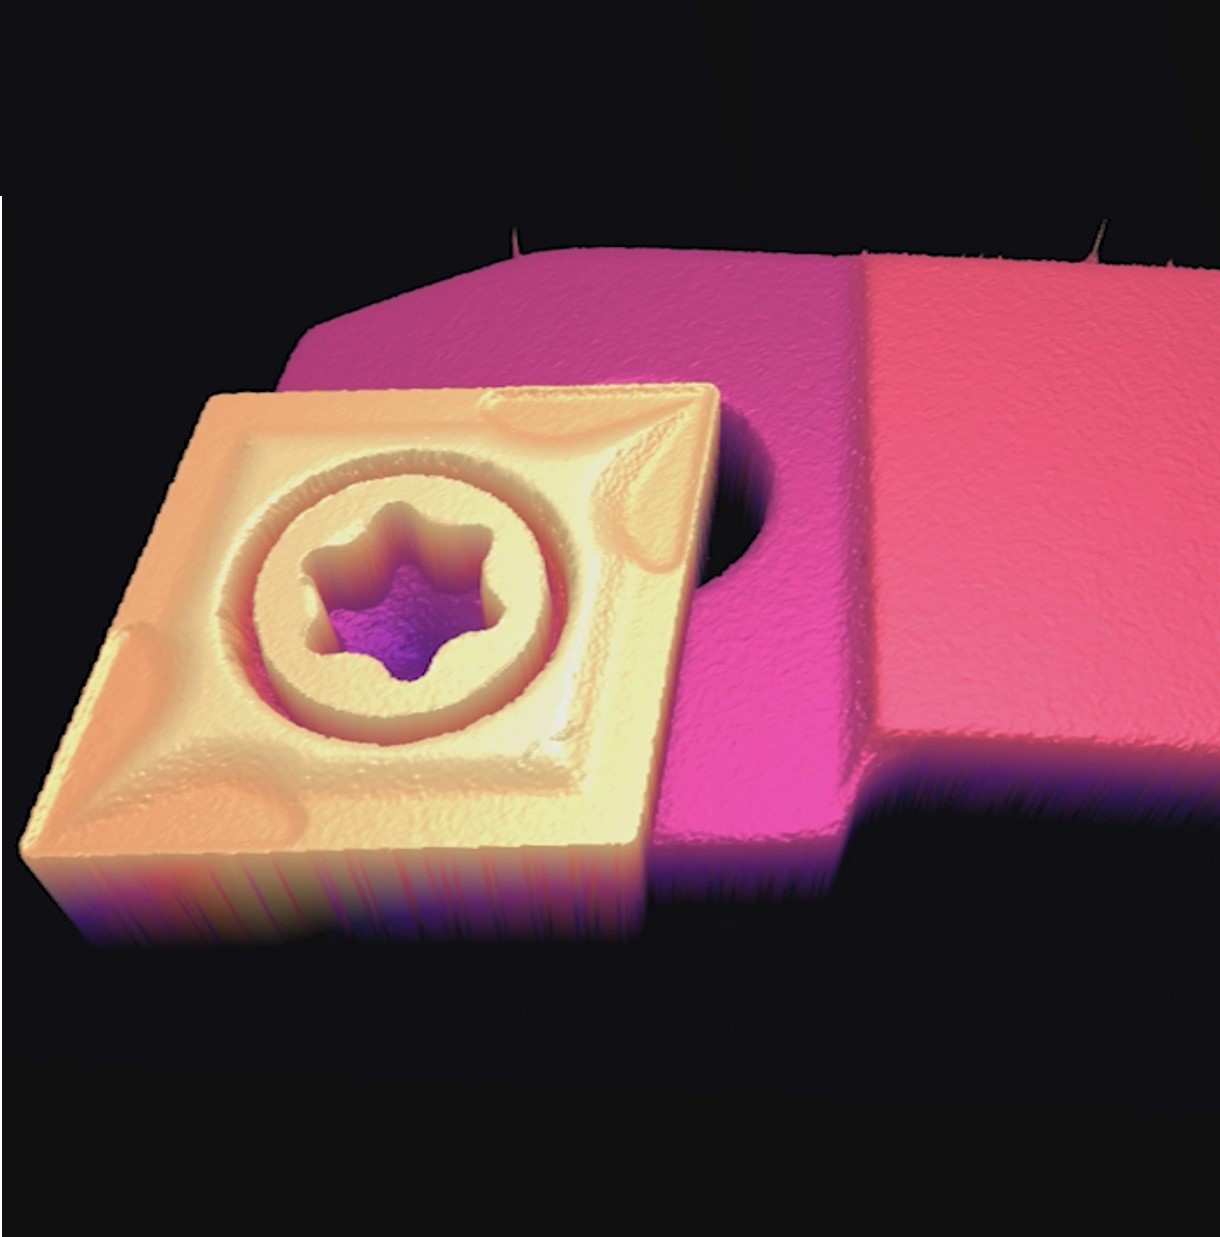
Manufacturers need fast and precise metrology solutions to meet the high quality requirements and the ever-demanding designs of modern manufacturing. This is especially true for machine tools that are at the heart of today's production processes and are subject to tighter and tighter tolerances. With their 500kHz acquisition rate and 1μm resolution, OptoComb 3D scanners are ideal to meet manufacturer's challenges and streamline their manufacturing process. In seconds, you can obtain a high-accuracy scan of your tools insert, detect the presence of microdefects and instantly assess the insert dimensions and positioning.

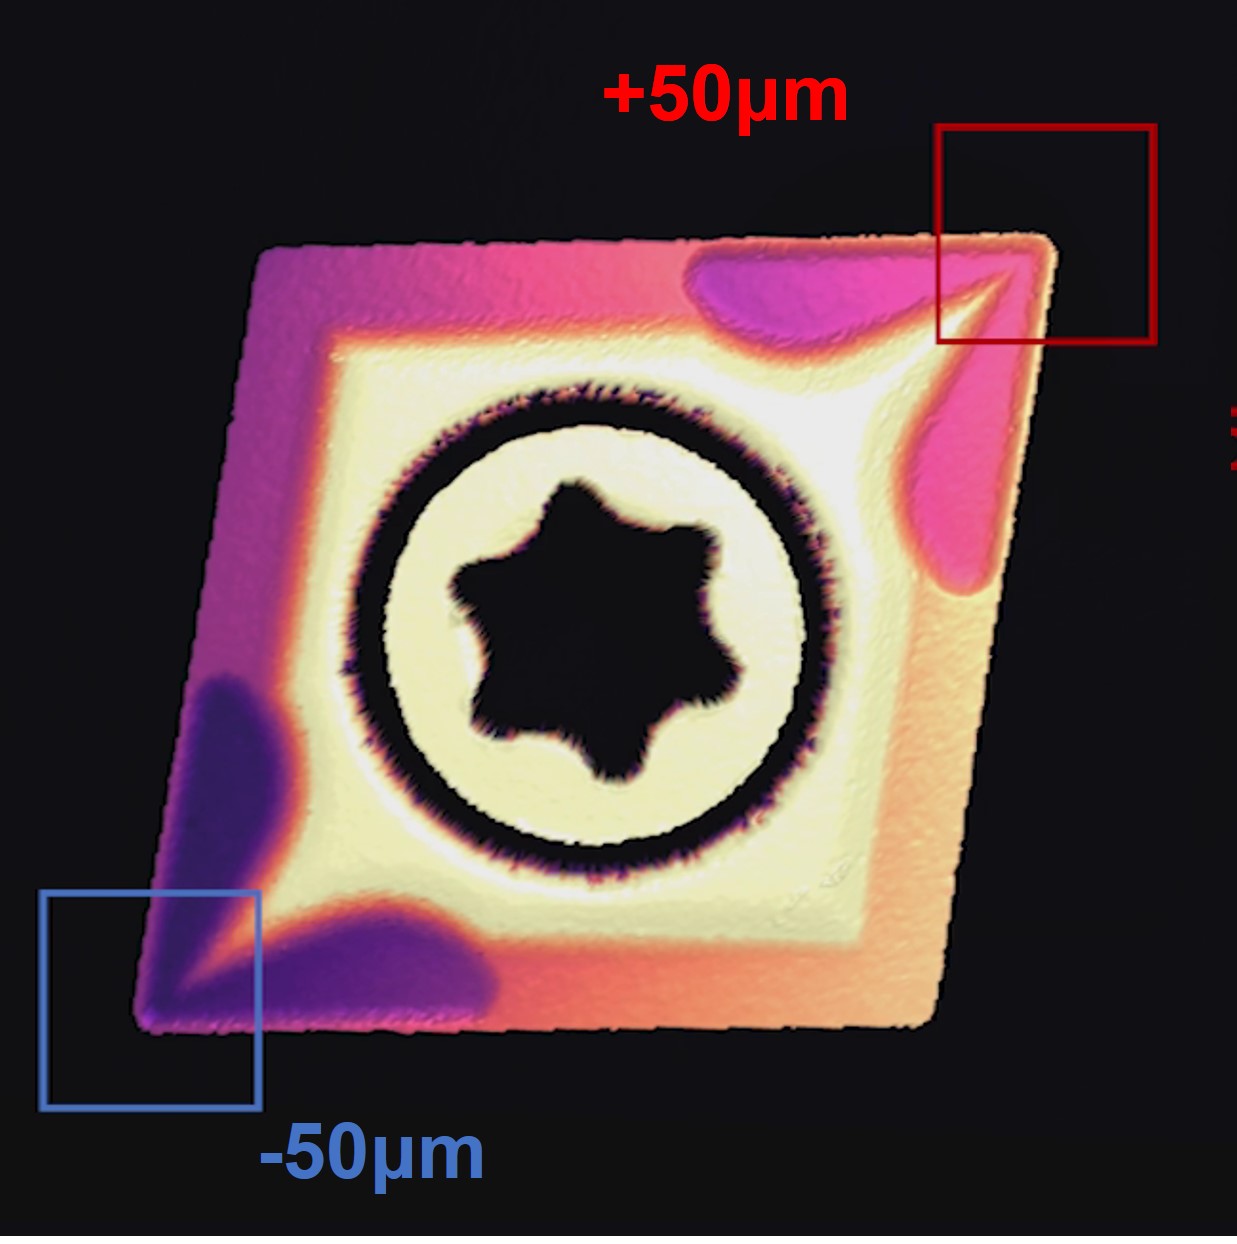
The positioning of your tool is of outmost importance to meet tolerances and maximize the effective output of your manufacturing process over time. With OptoComb 3D scanners , you can leverage the high-accuracy OptoComb data to confirm the tool positioning, detect deviations and track the tool drift with micrometer resolution. For example, a slowly loosening screw causing microscale tilting of the insert with respect to the holder can be instantly detected, identified and quantified.

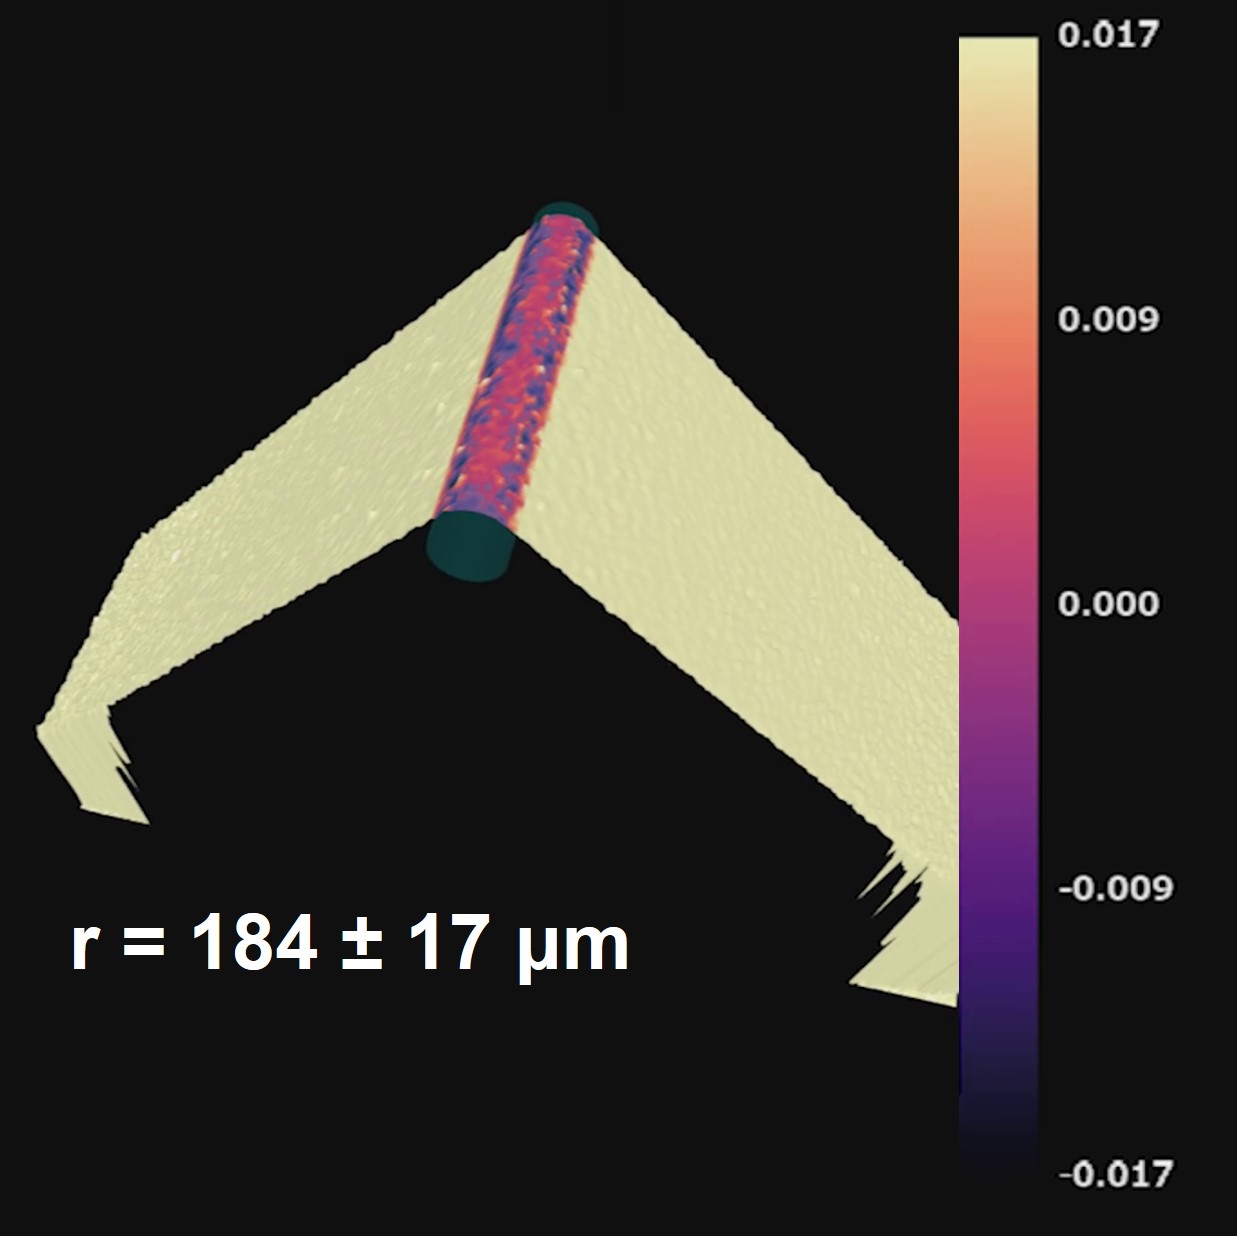
The OptoComb Suite, our comprehensive metrology software, can perform the processing and visualization of the 3D OptoComb data in order to streamline the dimensional inspection process of the insert. With its built-in fitting algorithms and its automated inspection recipes, the OptoComb Suite is a user-friendly solution that can extract key dimensional features of the cutting tool. You can for example calculate the radius of the insert corner with microscale accuracy and make sure that it fits the high requirement of your manufacturing process.

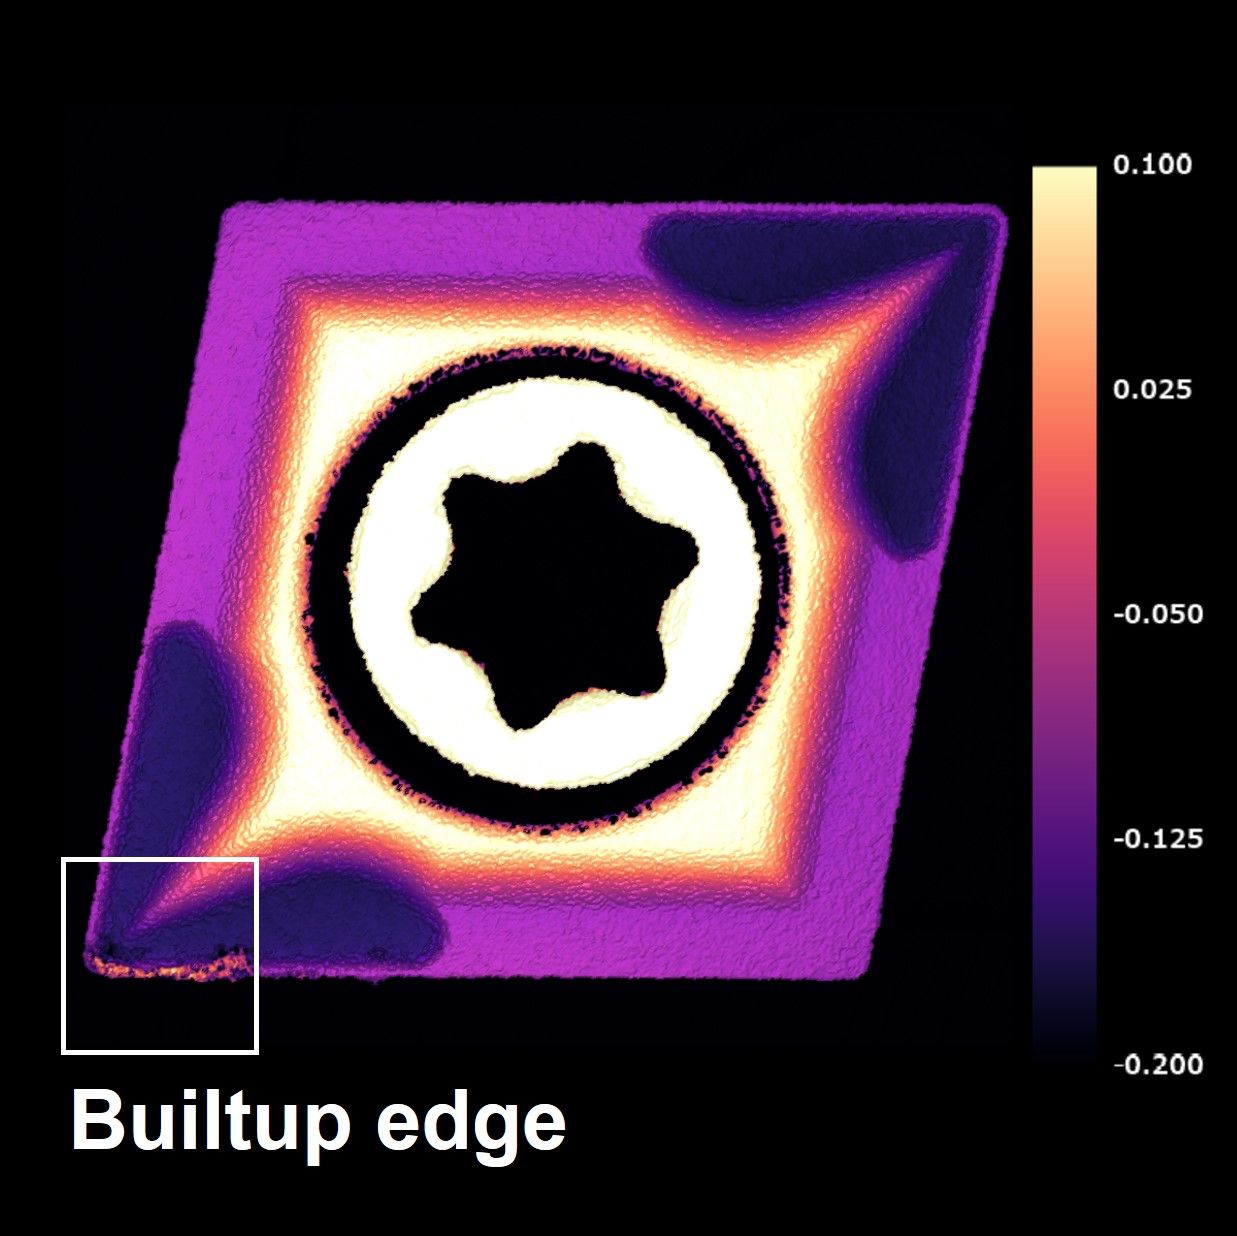
Beyond positioning and dimensional inspection, a single 3D scan of the insert allows to detect, identify and quantify damages to flank and rake faces before they affect the manufacturing process. With the 1 μm resolution of OptoComb 3D scanners, you can finely track the usual damages to your tool insert such as crater wear or flank wear. You can also detect the apparition of abnormal damages such as chipping, builtup edges, flaking, welding, plastic deformation and more. Leveraging the quantitative data obtained with OptoComb 3D scanners, it is then possible to optimize your manufacturing process in order to delay tool wear development and maximize output.
